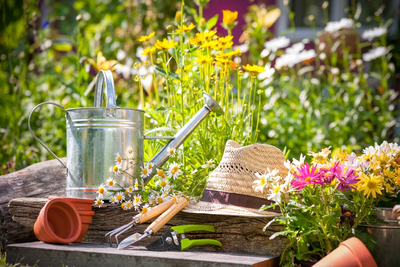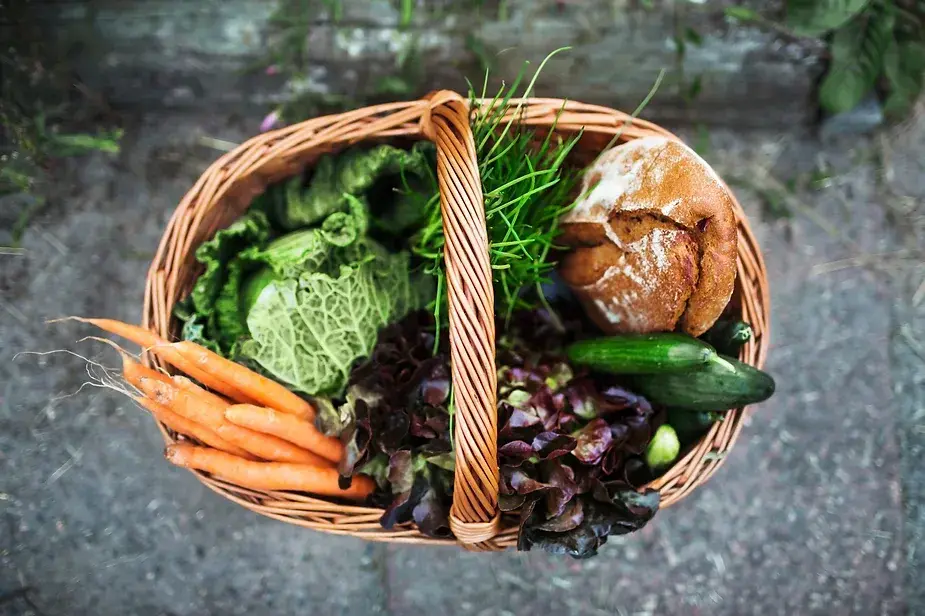
Grow Your Own Fresh Vegetables
Vegetables are an important part of your everyday diet. Discover for yourself why people say "home grown is best".
Beans
Broad Beans
These are the earliest of the family to put in an appearance.
- If you wanted to feed a family of two adults and two children you should allow space for three 15ft (4.5m) rows with the rows 18in (45cm) a part and the plants about 12in (30cm) a part.
- Prepare the site by digging in home-made compost, well-rotted manure or an organic growing medium, followed by a dressing of dolomite limestone. Prior to sowing give the site 4oz (112g) per square yard/metre of a balanced fertilizer.
- Sow the seed singly in peat pots in a cold greenhouse or cold frame in late winter or sow direct into the soil 2in (5cm) deep in early spring.
Runner Beans
These are one of the most popular summer vegetable, and can add a lovely accent to your garden, as they will grow up a fence, pole or wigwam of canes.
- You can look forward to a plentiful supply of tender, succulent beans from early summer through to the first frosts of the late autumn.
- For best results prepare the site by digging in compost or manure, followed in early spring by a dressing of dolomite limestone. In spring give a dressing of a balanced fertilizer. Delay sowing until all danger of frost has passed and never when the soil is cold and wet.
- Self-sufficiency for a family of four is achieved with two 15ft (4.5m) rows to produce about 100 to 150 lbs of fresh beans. The seed is sown 2in (5cm) deep and 9in (23cm) apart.
Garden Variety Beans
- Plant when the soil temperature has reached a minimum of 50°F (10°C), because cold, wet soil will rot the seed.
- Plant after the last frost, placing the seed about 2in (5cm) deep and about 9in (23cm) apart in the rows. Alternatively, sow the seed in trays or singly in pots in a frost-free greenhouse for transplanting in late spring.
- It is important to keep the crop picked while the pods are young, tender and stringless. Freeze any surplus as you go along.
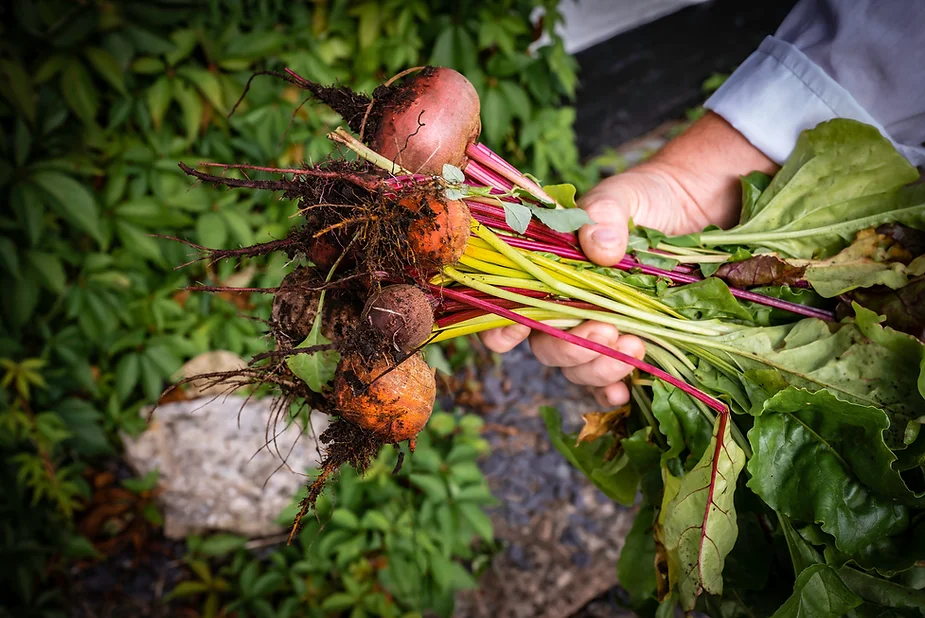
Beet (Beetroot)
As a salad crop these are best used when only the size of a golf ball. They can also be pickled at this stage. The main crop beet should not be allowed to become too big and this means lifting and storing them in early autumn.
- Sow thinly in a trench 1in (2.5cm) deep and 12in (30cm) apart, thin out to 4in (10cm) apart. Too early sowing can result in the crop bolting (running to seed), so make the first sowing in mid-spring, with a successional sowing about four weeks later; and the main crop sowing in early summer.
- Beetroot seeds are actually a cluster of several seeds and they can be left to develop as a cluster of four to five roots.
Broccoli
Purple sprouting broccoli is a gourmet vegetable that everyone can grow. It is rich in dietary fibre and has as much vitamin C as oranges. Of all the brassicas, this gives the best return for the space it occupies. A bonus is that the sprouting broccoli is cropped when other green vegetables are in short supply.
- One row of 15ft (4.5m) will accommodate six plants to give self-sufficiency for a family of four.
- Sow the seed in spring in a seed bed 1/2in (1.25cm) deep and transplant when the seedlings are about 4in (10cm) tall 2ft (60cm) apart each way Cut the tender shoots, beginning with the centre, while the flower buds are still in a tight bunch and continue taking the shoots for up to seven weeks.
Brussel sprouts
Crisp texture, a nutty flavour and a long cropping season make this one of the staples of autumn and winter meals. Choose a variety to suit the space you have available.
- Sow in a seed bed 1/2in (1.25cm) deep from early spring for transplanting in late spring or early summer 3ft (90cm) apart.
- Water the young plants before transplanting and firm the soil very thoroughly afterwards.
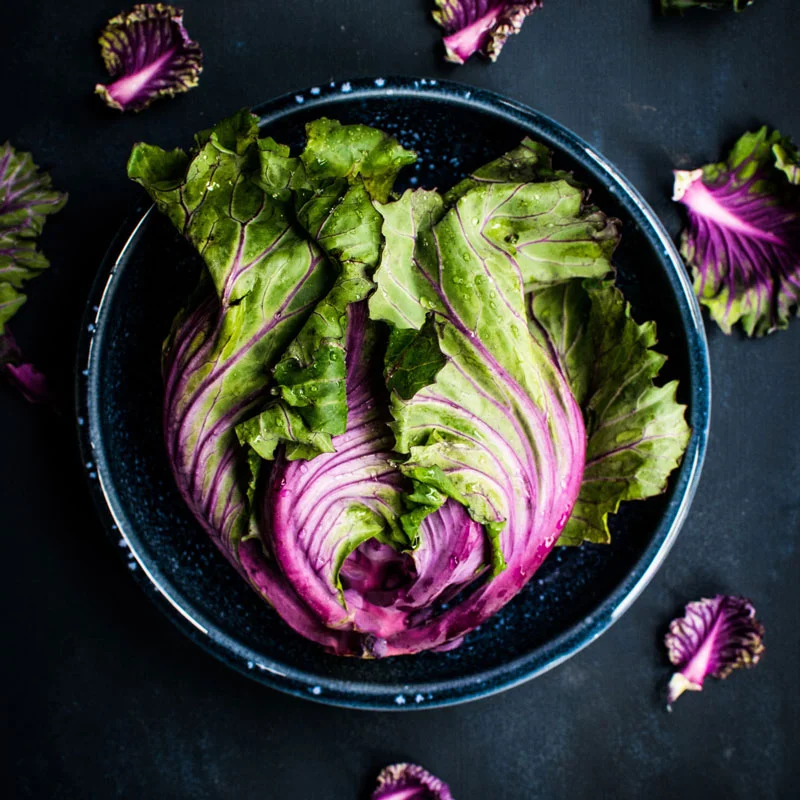
Cabbage
- Raise the plants in a seed bed and transplant when the seedlings have made four or five leaves.
- Summer cabbage is sown in spring 1/2" (1.25cm) deep for planting out in early to midsummer 12-18in (30-45cm) apart.
- Winter cabbages are sown in late spring for planting in mid-summer 9-18” (23-45cm) apart. Planting distances have a major impact on the finished size of the cabbage: close planting results in small cabbages.
Carrots
Carrots should be sown in succession to give baby carrots in late spring and early summer, followed by the main crop.
- Sow an early variety in a sheltered position in the garden with the main crop sowings in mid to late spring. Sow the seed 1/2in (1.25cm) deep with the rows 6in (15cm) apart. Thin out in stages to 4-6in (10-15cm) apart.
- Two 15ft (4.5cm) rows of main crop carrots will give a yield of 60 to 80 lb and the roots can be lifted from late summer onward, in favourable areas the crop can be left in the ground with a covering of straw or plastic sheeting and lifted as required.
- The main pest of the crop is the carrot fly which lays its eggs alongside the plants. When they hatch, the maggots tunnel into the roots causing the plants to wilt and, eventually, to die while the roots become riddled with holes. The only effective control is to erect a barrier to prevent the fly reaching the crop. Woven plastic fleece can be placed over the seedlings or panels of polythene sheeting tacked to wooden frames can be erected round the rows.
Cauliflower
This crop is fussier than the other brassicas. It needs an organically-rich soil and must never go short of water. It also needs a generous amount of space.
- For an early summer crop, sow the seed indoors in winter in trays and propagate at about 60-65F (15-18C). Transplant in early spring 18 x 24in (45 x 60cm) apart.
- Autumn maturing varieties are sown in a seed bed in spring and transplanted in early summer 24 x 28in (60 x 70cm) apart. Sow the seed 1/2in (1.25cm) deep, thin to 3in (7.5cm) apart transplant when the plants have made five or six leaves.
Celery and celeric
Celery is a crop that repays a lot of attention, while celeriac is hardier and requires less management. Both crops have a characteristic nutty flavour and are delicious raw, in winter salads, or cooked as a vegetable.
- Trench celery requires early preparation of the site with a 1ft (30cm) trench dug early in the year: The bottom is filled with 6in (15cm) of manure or compost, followed by a 3in (7.5cm) layer of soil. The remainder of the soil is used for piling around the crop.
- Seeds are sown indoors in early spring in trays of growing medium at 55-60F (1316C). Surface sow celery as the seed needs light to germinate, but lightly cover the celeriac. At the two true leaf stage prick out the seedlings into boxes at about 3 in. (7.5cm) apart or individually into small pots.
- Harden off the plants gradually when the weather starts to warm up and plant out in early summer. Allow about 9in (23cm) apart each way for celery plants and slightly more for the celeriac. Both crops need adequate moisture throughout the growing period.
- Celery should be protected from autumn frosts with straw, boxes, or landscape fabric. Celeriac can be lifted in late autumn and stored.
Chicory
Used in winter salads for its tangy bitter-sweet taste and crisp texture.
- Seed should be sown early in the summer direct into moist, rich soil. Germination can be rather erratic in hot weather; but growth is rapid once the seedlings emerge. Sow salad chicories in shallow rows 12in (30cm) apart and thin out to 5in (13cm) apart.
Chinese cabbages
Looking somewhat like a self-folding lettuce with conical hearts and crinkled leaves, they are quite unlike lettuce or cabbage. The flavour is delicate and the texture crisp when eaten raw as a salad, and when cooked the flavour and nutritional values are retained.
- Choose a site that is slightly alkaline but rich in organic matter and highly water retentive. Chinese cabbages give their best performance in late autumn and early winter.
- Sow direct into soil blocks or 3in (7.5cm) peat pots and maintain a minimum temperature of 50F (10C) from germination to planting out. Transplant at the two-leaf stage, allowing 12in (30cm) apart each way.
- The plants are shallow-rooted and must never be allowed to dry out. Water thoroughly and mulch with peat, home-made compost or composted bark. The mature hearts should be cut just above ground level. Although best eaten immediately after cutting, the hearts can be stored for up to three weeks in a refrigerator.
- These are members of the brassica family who should be protected from cabbage root fly and rotated as a precaution against disease.
Cucumbers
- They should be sown early in the year, singly, in small pots of peat-based growing medium around 1/2in (1.25cm) deep. Place in a warm area with good air circulation or heated propagator. Transplant individually in 5in pots.
- Plant out at the four-leaf stage into large pots or directly into the garden. Water regularly. Pinch out the growing point and allow two side shoots to develop.
- Spray with water well during hot weather and feed weekly with a liquid fertilizer high in phosphorous.
- All-female varieties can be allowed to fruit only on the main stem with the side shoots removed along with any male flowers that might appear.
Kohl rabi
A delicious alternative to turnips and many people find it easier to grow. The edible part is the swollen stem which can be cooked whole or sliced when about the size of a tennis ball.
- Sow the seed in spring 1/2in (1.25cm) deep in rows 12in (30cm) apart for use in summer. Thin out to 4-6in (10-15cm) apart.
- Sow the winter crop in mid-summer.
Endive
This is another basic ingredient of autumn and winter salads giving crisp, tender leaves after blanching.
- Sow the seed thinly and shallowly in succession from spring to mid-summer. Sow in rows 12in (30cm) apart and thin out seedlings to 12in (30cm) apart.
- Blanching makes the leaves of chicory and endive white with a sweeter flavour and crispier texture. It is carried out from late autumn to midwinter and simply involves covering the plants as required when the leaves are dry. Use upturned flower pots, or wooden boxes
Leeks
This is a gourmet vegetable that every gardener can easily grow.
- Seed can be sown under glass in winter or outdoors in early spring, very thinly about 1/2in (1.25cm) deep.
- When the seedlings are about as thick as pencils, transplant them to 6-8in (15-20cm) deep holes, made with a dibber, and spaced 6in (15cm) apart each way. Simply drop the leek into the hole, and fill with water.
- About three weeks after planting out give the leeks a dressing of a balanced organic fertilizer, and a second dressing about three weeks after the first.
- Leeks are hardy and should be dug as required for the kitchen.
Lettuce
A crisp and freshly picked lettuce is at the heart of many delicious salad meals, snacks and sandwiches. It comes in a variety of forms, and the season for lettuce can be extended from late spring and summer into autumn.
- Cos and iceberg types of lettuce are ready to eat 10-12 weeks after sowing, while the loose-leaf varieties are ready to start cutting about seven weeks after sowing.
- For all types sow about six feet (two metres) of row at a time, as shallowly as possible, making the first sowing in early spring, preferably with landscape fabric as protection. Sow thinly in rows 12in (30cm) apart and thin out to 6-12in (15-30cm) apart. Successional sowings can continue until mid-summer at roughly three-week intervals. The seed will germinate at quite low soil temperatures, but can prove stubborn to germinate when the soil temperature rises above 75F (24C).
- Try harvesting the young leaves and not the hearted lettuce. This should cause yields to be higher; cropping is earlier and less space is needed to produce the same amount of lettuce.
- The needs of a family of four throughout the season can be met from an area of 5-6 square yards using the leaf lettuce method -less than half that required for hearted lettuce production. 5-6 square yards should produce a quantity of leaves equivalent to 4-5 hearted lettuce per week.
- Most good garden soils should not need any additional fertilizer and if fertilizer is given. Care should be taken to avoid giving too much nitrogen as this causes bitterness in the leaves.
- The soil should be moist but not wet and the seed bed raked thoroughly before sowing to ensure a fine tilth.
In this method:
- Lettuce is grown very close together in rows 5in (12.5cm) apart. A row 1/2-3/4in (12-19mm) should be drawn out and the seeds sown thinly along it. There should be approximately 14-16 seeds per foot of row, which ought to produce about 12-15 plants per foot. Sowing can be done at 14 day intervals from April-mid May and again in August for continuity of supply. The length of row will depend upon the amount you will require over 7 days as sowing and harvesting are done ideally at 7 day intervals.
- Little cultivation is necessary, no thinning is required, and very little weeding as the plants will soon smother germinating weed seedlings.
- Harvesting should take place about 60 days from an early sowing and 40 days from a mid-season sowing. Start at the end of the row and cut only as much as you need each day, bearing in mind that freshly harvested vegetables lose a lot of their vitamins very quickly after being harvested. If you wish to make two harvests from the bed, the plants should be cut at about 1/2-1in (1.25-2.5cm) from the ground. Afterwards the area should be cleared of debris and the soil watered. Re-growth from the stem bases should occur in about one or two weeks.
- It is best to use only the leaves from one re-growth as the old stumps may harbour pests and diseases.
- Leaf lettuce production can be tailored to your weekly requirements, there will be no waste from bolting and less ground is used. Only 10 sowings should be required to produce crops ready for harvesting at weekly intervals from early June to late October.
Melons
- Sow the seed in early spring in a heated propagator or greenhouse at a steady temperature of 70-75F (21-24C), setting each seed 1/2in (1.25cm) deep in a small pot of peat-based growing medium. At the four-leaf stage the plants can be moved onto an open sunny site, allowing each plant 3 feet of space.
- Under cover it is advisable to hand pollinate the female flowers (those with a slight swelling behind the petals) by dusting them with pollen from male flowers which have no swelling at all. Melons must have plenty of moisture at all times along with regular feeding with a liquid fertilizer.
- Melons need a fertile well drained soil which warms up early, and with plenty of rotted compost dug in the previous autumn. They need a soil temperature of 71-77F (22-25C) and an air temperature of above 65F (18C) to flourish. Raise the plants as described, about 3-4 weeks before you intend to plant outdoors.
- Plant in single rows, after all risk of frost has gone and the soil is warm, 20-36in (50-90cm) apart and 6-8ft (2-2.5m) between rows or other vegetables.
- Water well after planting until established and dig a shallow water tunnel either side of the row, each approximately 21/2ft (80cm) from the centre of the plant for watering.
- When the plants have made 4 true leaves, cut off the growing point just above the 3rd true leaf. With vigorous plants a second pruning at the 8th leaf can be made. They should run along the ground and need no support.
- When the flowers appear, hand pollination can prevent mis-shapen fruits.
- Watering is most necessary just after the fruits set, at this stage water regularly and feed at 10-14 day intervals with liquid feed.
- Wait until the fruit is fully mature before harvesting. At this stage a small crack will appear near the stalk and it will have a rich fruity fragrance. Harvest with 1/2in (1cm) of stalk attached.
Onions
The easiest way to grow onions is from sets which are small immature onions that have been heat treated. They can be planted in early spring for harvesting in early summer.
- You can plant direct into moist soil or give them a start by placing them on a tray of moist soil or peat somewhere warm until the roots have grown about an inch.
- Plant the sets so that just the tip is showing, allowing about 5in (13cm) between each, and about 12in (30cm) between the rows.
- One pound of onion sets should give a finished crop of about 70 lb. When the foliage starts to turn straw-coloured, ease the onions from the soil and allow to dry off until the skins are brittle. Hang the onions in nets or traditional strings in a cool, dry place, where they should remain in good condition for at least six months.
- Onions can also be grown very successfully from seed sown under cover in trays early in the year or in shallow trenches outdoors. Transplant the seedlings in spring at the same distances as for sets and use any thinned as salad onions.
- Winter onion varieties are sown in late summer to overwinter and harvest the following spring or early summer. Sow the seeds about 1in (2cm) apart in shallow trenches 9in (23cm) apart and thin out to 4in (10cm) apart the following spring.
Pak Choi
A leafy brassica sown in spring for a succession of cut and come again leaves or sown in summer for harvesting in the autumn
- Seed sown direct into rich organic soil will produce a crop ready for harvesting within about six weeks. Sow 1/2in (1.25cm) deep in drills 15in (38cm) atitle and thin out to 9in (23cm) apart.
- A feature of Pak Choi is that the tender succulent leaves with thick stalks are mild flavoured and never become tough, so there's no waste. They are equally suitable as a cooked vegetable or raw in salads.
- If sown direct into the garden, unheated greenhouse or cold frame, the thinnings can be used as salad material, giving the plants a spacing of 8in (20cm) apart each way to grow to maturity.
Parsnips
Parsnip seed is very slow to germinate, so a sowing in early spring as soon as the soil is workable is recommended.
- Sow in rows 1in (2.5cm) deep with the rows 12in (30cm) apart.
- Thin out gradually to one seedling every 5-8in (13-20cm).
- Some gardeners sow a quicker growing marker crop, such as radish, to indicate the position of the drills.
- Mature parsnips may be left in the ground over the winter for lifting as required or the entire crop can be lifted and stored in peat or sand.
Peas
Few vegetables can match tender, sweet garden peas, picked straight from the plants and eaten within an hour or two. For those with the room to spare, three 15ft (4.5m) rows of an early variety and another three rows of a main crop gives self-sufficiency for a family of two adults and three children.
- This is a crop that repays careful preparation on of the site as early in the year as possible. Choose an open, sunny position with deep soil, conditioned with organic manure and well drained. Just prior to sowing give a top dressing of a balanced organic fertilizer or an inorganic one.
- Sow the early varieties in early spring with the main crop following about four or five weeks later: Make a flat-bottomed trench about 6in (15cm) wide and 3in (7.5cm) deep. The space between each row should be approximately the height of the crop. Sow the seeds in three rows in the trench 2in (5cm) apart each way and cover with 2in (5cm) of soil.
- Cover the rows with pea guards or stretch black cotton along the rows to protect the seedlings from birds. When the seedlings are about 4in (10cm) tall give support with twiggy sticks or netting supported by stakes.
- Do not allow the pods to become overripe as this shortens the harvesting period. Any surplus peas can be frozen very successfully.
Peppers
Peppers are a great crop for amateur gardeners because crops can be produced outside in growing bags, large pots or other containers. Peppers are rich in vitamin C and can be used in salads, either raw or cooked and cooled.
- Sow the seed as for tomatoes and move the young plants into 3in (7.5cm) pots at the four-leaf stage.
- Plant out after hardening off when all danger of frost has passed.
- Peppers are particularly suited to production in the unheated greenhouse which should be kept well ventilated and sprayed regularly in hot weather as an aid to pollination and a deterrent to red spider mite.
Radishes
These are easy to grow and can be intercropped with rows of lettuce or beets or broadcast in patches to take up a minimum amount of space. The earliest sowings can be made in a cold frame or under landscape fabrics in late winter with successional sowings following at about three-weekly intervals.
- Choose a sunny, sheltered position in soil that is well fed with organic matter. Sow the seed thinly, evenly and shallowly in rows 4-6in (10-15cm) apart and thin out early to 1 in (3cm) apart.
- Water the soil thoroughly before sowing and after the seeds emerges.
Shallots
- Shallots, like small onions, are ideal for pickling, for flavouring and for grating or slicing in salads. They are grown from bulbs, each of which produces 10-20 mature bulbs, and are planted in late winter for harvesting in early summer.
- Push the bulb into the soil to half its depth, spacing the bulbs 6in (15cm) apart and the rows 9in (23cm) apart.
- Ensure the shallots are thoroughly dry before storing in nets or trays where they will keep in perfect condition for up to 12 months.
Spinach
- A highly nutritious and easily grown crop. Sow spinach in spring outdoors as soon as the ground can be worked, in drills ½in (1.3mm) deep 1in (2.5cm) apart, in rows 16in (40cm) apart, preferably in a well manured organic soil in a sunny location or partial shade. Thin seedlings to end up 10in (25cm) apart.
- It takes almost 9 weeks from sowing to picking, provided that the soil doesn't lack moisture. So make successional sowings at 2-3 week intervals until mid-summer.
Sweet Corn
- Sow the seed after the last frost, 2in (5cm) deep, 3 seeds per hill or 4in (10cm) apart, in rows separated by 24in (60cm), where the crop is to mature. Thin seedlings to one every 12in (30cm).
- Plant out in early summer in blocks separating the varieties. This is to help the pollinating. Or tap the top of the stem to transfer pollen from the male flowers to the female ones below. Most plants will produce two cobs, the first being larger than the later second. To test the cob for ripeness, press a grain with a finger nail and if the juice is milky, it is just right.
Swiss chard
- This is also known as seakale beet, silver chard and ruby chard. It is a dual-purpose vegetable: the leafy part being used as an excellent alternative to spinach while the thick, fleshy mid-ribs are cooked and used like asparagus.
- Sow as for spinach and harvest from late summer to late autumn. The foliage dies off during the winter but there is rapid re-growth in early spring.
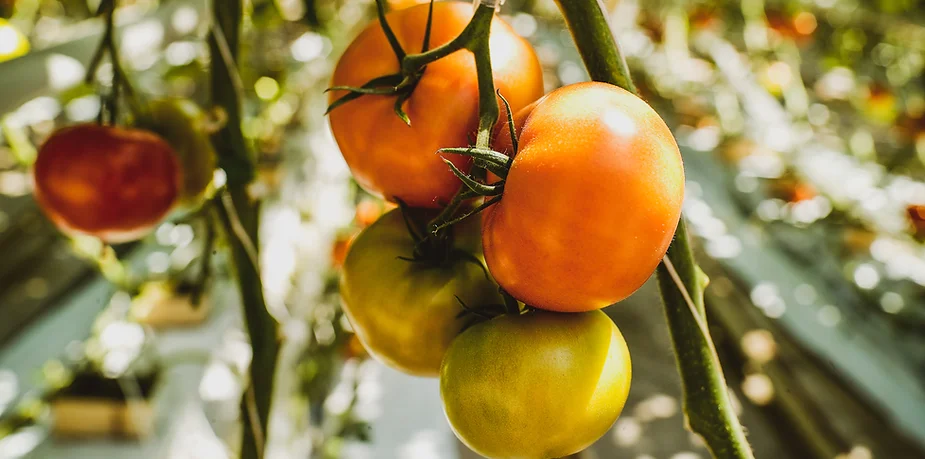
Tomatoes
Raising your own tomato plants has several benefits. For one thing, you can grow just the variety or varieties you prefer: You can save money and time and, perhaps best of all, you can pick your tomatoes at the peak of their freshness and full of goodness and flavour. What's more, tomatoes are one of the easiest crops to raise from seed.
- Tomato seed germinates readily at a temperature of 20-25 C so requires a warm place indoors for success. Sow the seed shallowly in a tray of peat-based growing medium 6-8 weeks before the last frost date in your area.
- When the seedlings have made two pairs of true leaves transplant into 3in (7.5cm) pots and place them in a light, warm place indoors or in the greenhouse. The object is to produce short-stemmed sturdy plants. Consider using a water soluble fertilizer every two weeks starting at half strength and increasing to full strength over six weeks.
- Transplant outdoors after all danger of frost has passed.
- Outdoors a warm, sunny site is needed to ensure a good crop. Set plants 60-90 cm (24-36") apart in rows 3ft (90cm) apart. These outdoor plants should be hardened off before planting out after the last spring frost. Bush tomatoes will also grow well in large pots on a sunny patio or against a south-facing wall or fence. Bush varieties, also called determinate, need no attention other than a mulch to protect the fruit from being splashed and, in northern districts, protection with landscape fabrics to increase the yield of ripe fruit.
- Staking varieties, also called indeterminate, which can be grown in both in the greenhouse and outdoors, need support. Those outside can be given a bamboo cane to which the plant's stem is tied with plastic string. In the greenhouse the stem of the plant is loosely tied to a length of string with the other end tied to a horizontal wire under the roof.
- Feed regularly during the growing season with a well balanced fertilizer and be sure to provide consistent moisture during fruit set and development.
- Pollination of tomato plants can be assisted by gently shaking the plants.
Turnips
This is a dual-purpose vegetable: delicious when small and tender as a late spring crop; versatile and long-lasting as a winter vegetable.
- Choose a quick-maturing variety, such as Early Snowball, for sowing 1/2in (1.25cm) deep in rows 6in (15cm) apart in early spring. Harvest the roots when they are about the size of tennis balls and use the tops as spring greens.
- Sow the main crop, such as Rapa da Mensa, in mid-summer and thin seedlings to 6in (15cm) apart.
- Keep the plants well watered in dry weather. Lift and store in late autumn, similar to parsnips.
Turnip (Rutabaga)
These are a hardy root crop requiring an open site and a long growing period.
- Sow in late spring in drills 1/2in (1.25cm) deep and 18in (45cm). Thin the seedlings to 6in (15cm) apart.
- Turnips and swedes are brassicas and should, if possible, be rotated with others of the family.
Have more questions? Visit your local Buckerfield's and we'll be happy to help!