Let's Get Canning!
Preserving food in mason jars might sound old fashion, but it is the latest food trend and it is really quite simple! Enjoy eating delicious fruit and vegetables that you have grown, or bought in season from a local farmer, or at the farmers market.
The best way to preserve fruits and vegetables is to pick them at the peak of their maturity, and get them from the garden to the freezer, dehydrator or canner immediately.
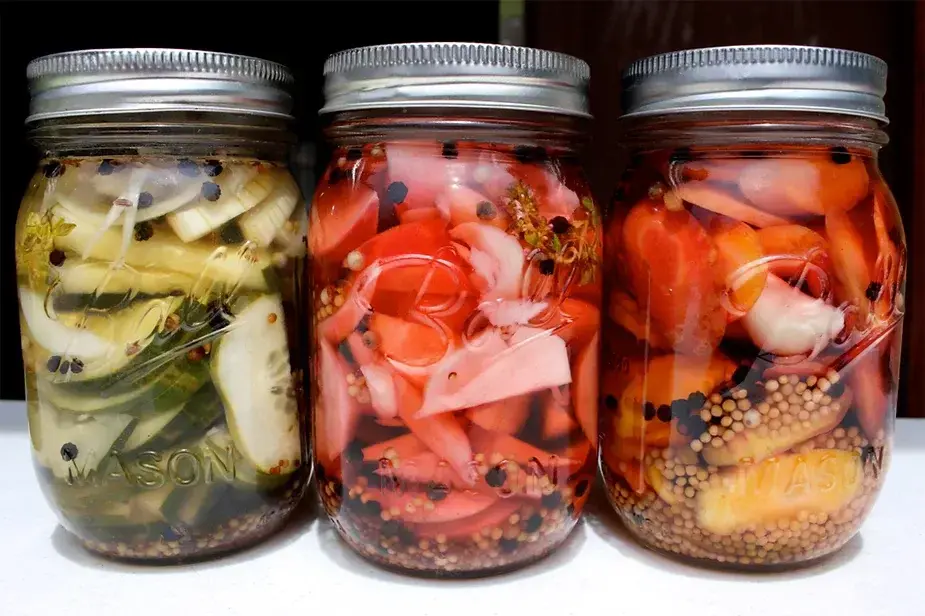
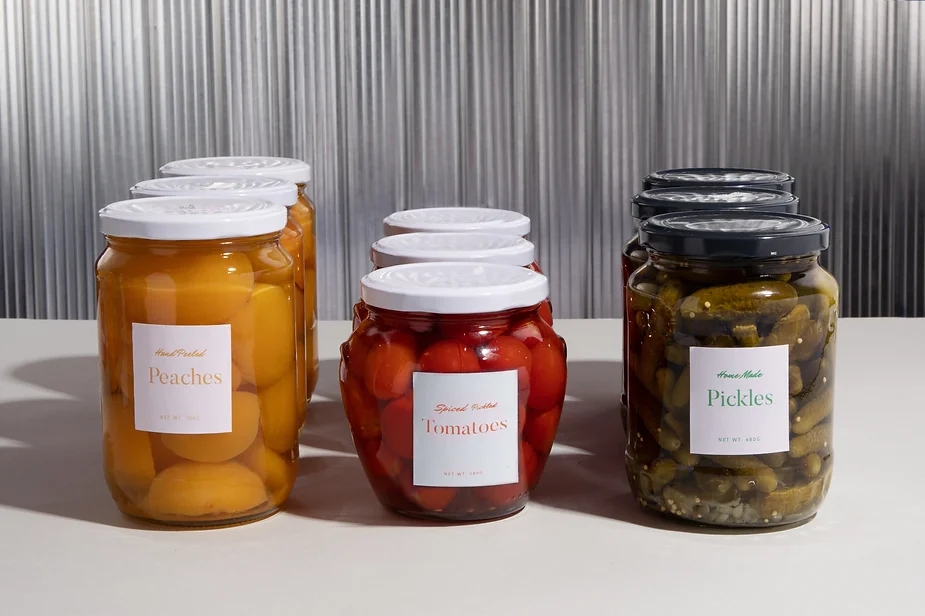
Water bath canning can provide you with a number of delicious foods, including jams, jellies, tomatoes, fruits and pickles. You can create foods that save you time in day-to-day food preparation.
During heat processing, mason jars filled with food and fitted with a two-piece metal closure are heated, destroying harmful microorganisms that cause food spoilage. This creates an air tight seal that prevents contamination of bacteria or mold during storage. Heat kills microorganisms and inactivates enzymes in food to prevent further deterioration.
A more advanced method is pressure canning. It requires a little specialized equipment, but it will unlock a wide world of food and flavor options.
How canning works
Together with the use of home canning jars and two piece metal closures, heat processing creates an airtight seal that prevents recontamination of food during storage.
Once a product has been heat processed and cooled to room temperature, the pressure outside the jar is greater than inside the jar. The greater outside pressure pushes the lid down, and the softened sealing compound inside the lid conforms to the rim of the jar, creating a hermetic seal.
This seal prevents bacteria or molds from contaminating the food during storage.
- Heating causes gases and food to expand, leading to a buildup of pressure inside the jar.
- The pressure is relieved as air from the headspace and food escapes from under the lid.
- This creates a vacuum inside a sealed and cooled jar.
Processing methods
Processing techniques, times and temperatures are determined by the acidity of the food being preserved.
High acid foods
A boiling water canner heats food to 100 degrees Celsius (215 degrees F) a temperature sufficient to kill molds, yeast and bacteria found in high acid foods.
- Fruits including jams and jellies are high acid foods.
- The addition of an acidic ingredient like vinegar or lemon juice is required if the vegetable or fruit is border line between high and low acid. Tomatoes are border line.
Low acid foods
Low acid foods have very little acid and need to be heat processed in a pressure canner. Pressure canners heat food to 116 degrees Celsius (240 degrees F) the temperature required to destroy toxin producing bacteria.
- Vegetables
- Meats
- Fish
- Seafood
Equipment to get started
Canning jars come in a variety of convenient sizes that let us preserve small amounts quickly.
- Glass canning jars
- Metal screw bands and canning lids
- Jar lifters: used to lift jars into and out of canners.
- Non-metallic spatulas: used to release air bubbles trapped inside filled jar.
- Pot holder
- Canning funnel: have wide openings and sit inside the mouth of the jar to make filling jars easier.
- A boiling water canner or a pot that holds enough water too completely cover jars.
Choose quality ingredients
Use only the freshest ripe produce, spices and herbs. Preserving food does not improve its quality. Always select the best quality produce and freshest ingredients. Preserve fruit and vegetables as soon as possible after they have been harvested or purchased.
Avoid vegetables or fruits that are bruised, wilted, moldy or blemished.
- Do not use diseased, moldy, insect damaged or overripe produce.
Packing vegetables and fruits
Raw pack
This method involves packing prepared fruit and vegetables into the canning jar raw. This method is great for fruits that are more delicate.
- The food is left uncooked
- Firmly pack vegetables or fruit into jars
- Jars will be not as full. Vegetables and fruits will shrink or soften during the canning process.
- Fruits or vegetables might float to the top of the jar
Hot pack
This method involves cooking prepared fruit and vegetables before placing in jars. This method is preferred for produce that is firm and easy to handle.
- More time consuming as food is precooked before filling jars.
- Jars hold more food.
- Pack hot foods in jar and process.
The Process
The basic rules of canning are simple and practical. It’s important to follow those rules and to use pre-tested recipes.
Check your recipe and follow all recommended directions. It’s as easy as boiling water!
- Wash jars, lids, and screw bands in hot soapy water. Rinse and drain well.
- Discard any jars that have nicks, cracks, uneven rims or any other defects.
Heat the jars
- Place rack on bottom of boiling water canner.
- Add water to the jars and the canner
- Cover canner and bring water to a simmer
- Keep jars hot until you are ready to use them
- Sterilizing jars is not necessary as heat processing destroys all microorganisms in the food and also the jars and lids.
Prepare closures
- Place lids in a small saucepan, cover with water and bring to a simmer. Do not boil.
- Keep lids hot until you are ready for them.
Prepare the fruit or vegetables
- Choose hot or raw pack
- Package all fruit and vegetables according to recipe
Fill the jars
- Place prepared food into hot jar, leaving the amount of head space specified in recipe. Headspace is the space between the top of the jar and the top of the food.
- Slide a non-metallic utensil down the inside of the jar between the food and the jar, to release any air bubbles.
- Wipe jar rim and threads with a clean damp cloth or paper towel.
- Place lid and screw on jar and tighten slightly. Do not over tighten.
- Place filled jar in hot water filled canner.
Heat process the filed jars
- Cover the filled jars in the canner with at least one inch of water.
- Cover the canner with a lid and bring to a rapid boil.
- Once the water is boiling begin timing the processing time specified in the recipe.
- The rapid boil must continue for the duration of the processing time.
Cooling the jars
- At the end of the processing time, turn off heat and remove canner lid.
- Wait 5 minutes to remove the jars. After removing jars from the canning rack, do not re-tighten or over tighten bands that may have come loose during canning, so as not to interfere with the sealing process.
- Place jars upright on a towel in a draft free place and let cool, undisturbed.
- Listen for the satisfying pop-pop-pops of the seals forming.
Checking the seal
- When processed jars have cooled for 24 hours, check lids for seal.
- Press down on the center of each lid with your fingers. Sealed lids will be concave (curved downward) and will show no signs of movement when pressed.
- Jars that are not sealed will make a clicking sound when pressed.
- Unsealed jars can be refrigerated and eaten.
Storage of canned food
- Label with product and dated processed.
- Store canned foods in a cool, dark, dry place.
- For best quality use within one year.
Safety
- Do not use any product that has come unsealed or shows signs of spoilage.
- It is a good idea to visually examine each jar before it is opened to ensure seal is still intact and food has not spoiled.
- Spoilage indictors include mold, cloudiness, leaking liquid, yeast growth, fermentation, slime and disagreeable odor.
- When in doubt throw it out!
Opening sealed jars
- Release the vacuum by gently lifting the edge of the lid with a can opener.
- Eat and enjoy!
Altitude makes a difference
As elevation increases, water boils at a lower temperature and you must increase the processing time.
Check with your local weather station or airport to determine the altitude of the location where you live.
High acid foods processed in a boiling water canner, processing time is increased as indicated below.
306-915 meters (1,001-3,000 feet) increase processing time 5 minutes.
916-1,830 meters (3,001-6000feet) increase processing time 10 minutes.
1,831-2,440 meters (6,001-8,000 feet) increase processing time 15 minutes.
2,441-3,050 meters (8,000-10,000 feet) increase processing time 20 minutes.
Low acid foods processed in a pressure canner, processing time is increased as indicated below.
Weighted Gauge pressure canners
0 to 305 meters (0 - 1,000 ft.) 10 lbs. pressure
306 to 609 meters (1,001 - 2,000 ft.) 15 lbs. pressure
610 to 1,219 meters (2,001 -4,000 ft.) 15 lbs. pressure
1,220 to 1,828 meters (4,001 - 6,000 ft.) 15 lbs. pressure
1,829 to 2,438 meters (6,001 - 8,000ft) 15 lbs. pressure
2.439 to 3,048 meters (8,001 - 10,000 ft.) 15 lbs. pressure
Dial gauge pressure canners
0 to 305 meters (0 - 1,000 ft.) 11 lbs. pressure
306 to 609 meters (1,001 - 2,000 ft.) 11 lbs. pressure
610 to 1,219 meters (2,001 -4,000 ft.) 12 lbs. pressure
1,220 to 1,828 meters (4,001 - 6,000 ft.) 13 lbs. pressure
1,829 to 2,438 meters (6,001 - 8,000ft) 14 lbs. pressure
2.439 to 3,048 meters (8,001 - 10,000 ft.) 15 lbs. pressure
Pressure canning
A pressure canner is a tall pot with a lid that locks in place and has a pressure regulating device.
Simply follow the steps below and you will have fresh preserved food to
enjoy anytime.
- Place filled jars onto rack. Canner should contain 2 to 3 inches of simmering water.
- Place lid on canner and lock into place. Turn heat to medium-high and bring water to a boil. Bring water to a boil and leave vent open until a steady stream of steam has escaped from vent for 10 minutes.
- Place weight on vent and adjust heat to achieve 10 pounds pressure, adjusting for altitude (see chart below). Process jars for the time specified in recipe, keeping pressure steady.
- When processing time is complete, turn off heat and let canner cool naturally. The canner will become depressurized and pressure will return to 0.
- Let jars stand in canner until pressure is 0 then wait another 30 minutes before removing lid.
- Remove jars from water and cool upright on wire rack or towel on countertop for 12 hours.
- After removing jars from the canning rack, do not re-tighten or over tighten bands that may have come loose during canning, so as not to interfere with the sealing process.
- Check jars to make sure all sealed.
Open, eat and enjoy! Make great gifts!
Have more questions? Visit your local Buckerfield's and we'll be happy to help!